
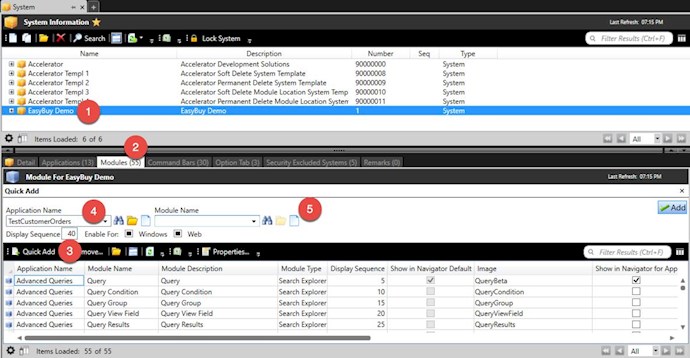
The AB_WebPageExplorer explorer component allows the addition of a module that requires zero coding and displays a web page using the WebBrowser Control. Launch the Accelerator Maintenance and Click on the "System" Module.
Step 1: Select the System that you want this new web page module to be added.
Step 2: Click the "Modules" tab in the Preview Area.
Step 3: Click the "Quick Add" button to show the quick add.
Step 4: Either select an existing Application or you have the option to create a new application by clicking on the "New" button next to the drop down.
Step 5: Create a new Module by clicking the "New" Button. If you already created the module, then select the module you want to add.
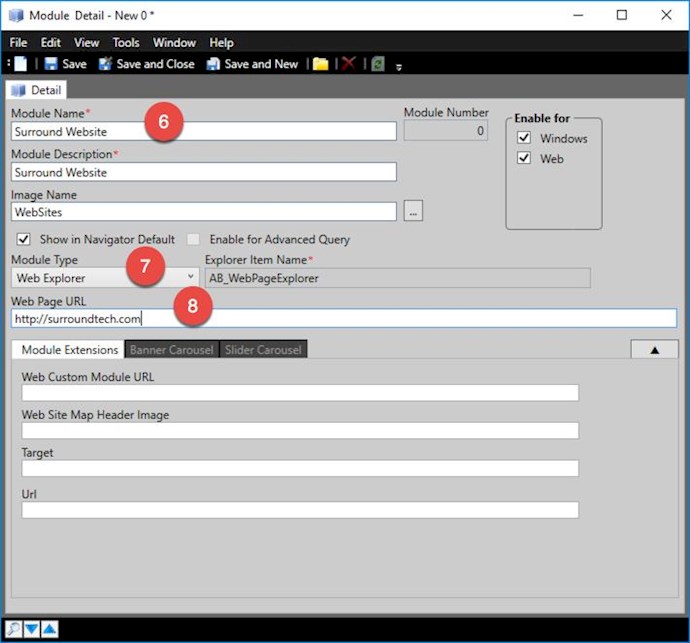
Step 6: On the New Module Detail, specify the Module Name, Description and Image. The Image must be an image that either exists in the Accelerator Core images folder or in your own image folder located in your WPF System Core Project.
Step 7: Change the Module Type to "Web Explorer".
Step 8: Specify the Web Page URL.
Step 9: Save and Close the Module Detail.
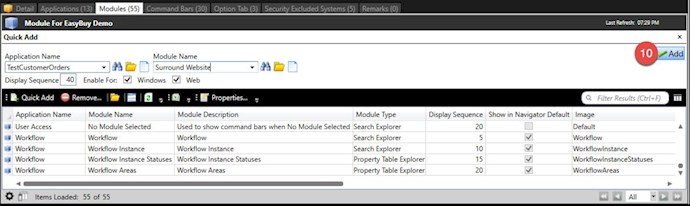
Step 10: Back at the Quick Add; Click the Add Button to add the new module to your application.
Step 11: Run you system and click on the new Module. The website you sepcified should be loaded.

Step 12: You will notice that the system command bars are being used. You can add module level command bars to your new module that replace the higher level command bars so that you only have the commands you want available.
