Accelerator has full support for multiple cultures and well defined best practices that are included in the runtime core components, helper classes, wrappers and development tools including the code generation engine.
What we did for you in the Accelerator:
There are 3 different areas that needed to be translated within the Accelerator Product itself. These areas include the:
- Accelerator Core Description and Message Resourse Files (.resx)
- Accelerator Maintenance Description and Message Resourse Files (.resx)
- Accelerator Database MetaData Names and Descriptions
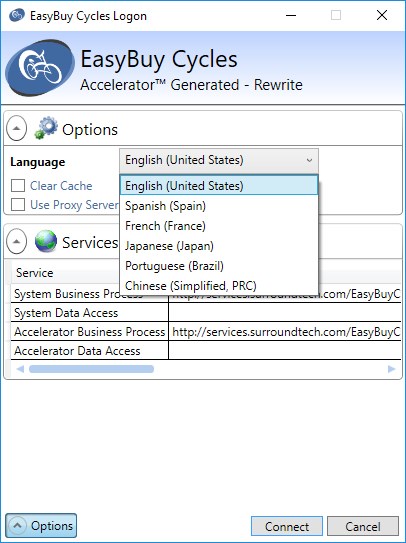
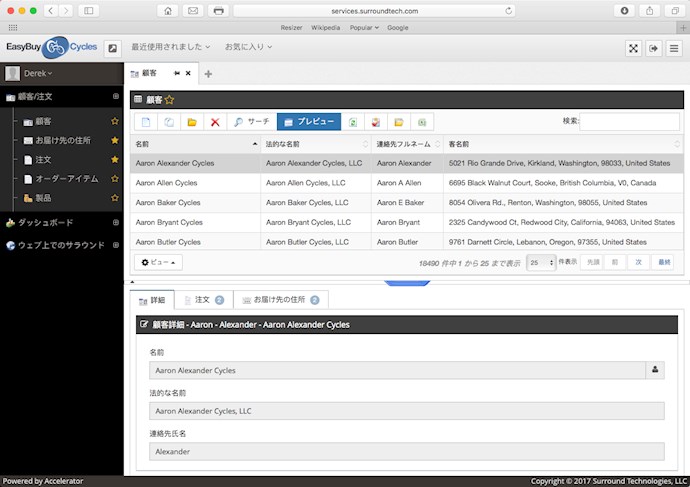
The Accelerator has language packs for several languages which were translated using Google translate and meant for demonstration purposes only. The following languages are Spanish (Spain), French (France), Japanese (Japan), Portuguese (Brazil) and Chinese (Simplified). The Description and Message resources for all these languages is included with the Accelerator Install for both the Accelerator Core and the Accelerator Maintenance. The Language packs for the Accelerator Database Metadata needs to be downloaded and run separately. You can download the SQL script here. All you need to do is unzip and change the "USE" statement at the top and run the script. This will insert data into the AC_MultilingualExt file in your Accelerator Database. Please contact us if you want to use a language in production or need to support additional languages. We will be happy to assist.
Your generated system has 2 different areas that need to be translated. These areas include the:
- BOS System Shared Message and Description Resources (.resx)
- Accelerator Database MetaData Names and Descriptions
Here is what you need to do to support a new Language:
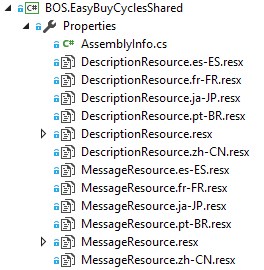
1) Add a Message Resource and a Description Resource for each language to the BOS System Shared Project and within the Properties folder. You will notice that you already have a MessageResource.resx and a DescriptionResource.resx. That was created when you initially generated the system and contains your default culture text. You can download the following sample resources and add them to the Properties folder. Just make sure to include them in your project. Or you can create the additional resourses (.resx) in Visual Studio. When you add the new Message Resource and Description Resource, you need to add the Culture Name for the language you want to support using this format: MessageResource.<CultureName>.resx and DescriptionResource.<CultureName>.resx. Refer to this link for a list of cultures. Here is an example with several resources added.
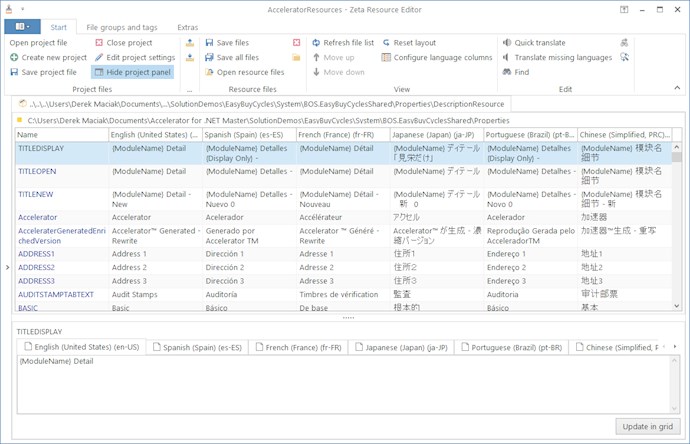
2) Translate the Message Resource and the Description Resource. There are several different resx managers out there. I recommend Zeta Resource Editor. All of them allow you to do side by side translation. I like Zeta Resource Editor because you can create Projects that contain a collection of resources and it has the ability to auto translate via Bing or Google Translate. You will need to open all your description resources as a group and translate them and then open all your message resources as a group and translate them. When you open them as a group, you will see that the manager puts your default resource first (That is the .resx without the Culture Name) and then the others follow it. Go ahead and translate and then save it when you are done. Remember you can use Bing or Google Translate.
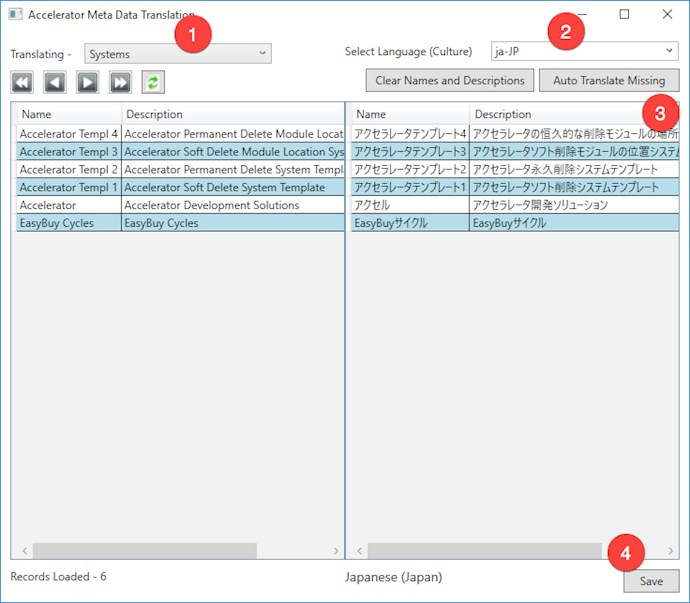
3) Translate your System MetaData Names and Descriptions that are in the Accelerator Database. You can do this by running the Framework Data Multilingual Translation Tool located within the Tools menu of the Accelerator LuanchPad.
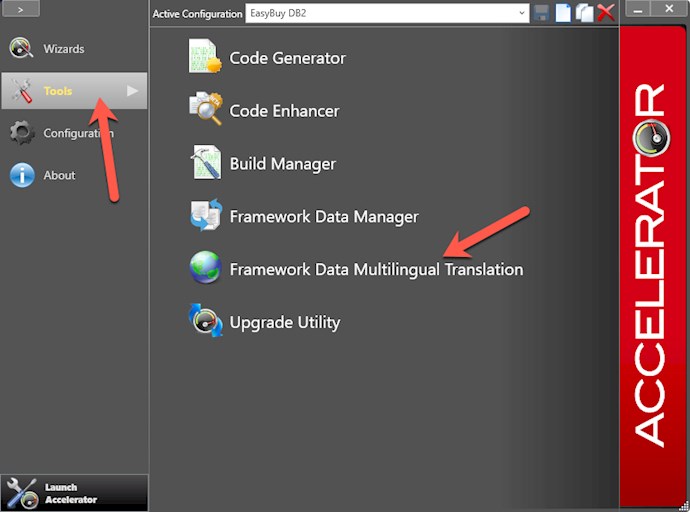
This will open the following window that allows you to 1) Select a table to translate, 2) Select a Language that you want to translate to, 3) Translate by clicking the "Auto Translate Missing" Button or by manually translating the Name and Description in the Grid and 4) Save the Translation. You will need to do this for each Table that is in the drop down from step 1 and for each culture you want to translate to in step 2.